
 Print
Print
|
|
|
Front and Back Module Installation
To install a Selenio module, the power supply can be on or off. Follow this procedure:
- Remove a blank back module from the frame.
Do not discard the blank back modules and their captive screws. You may need them for future configurations.
- Attach the new back module to the empty slot, using the mounting screws provided.
Align the back module’s pin into the guide hole, and ensure that the EMI gaskets separating the back modules remain in place during the installation. The EMI gaskets fit tightly. To ease the installation of back modules, gradually press each back module into place from the left side to the right side.
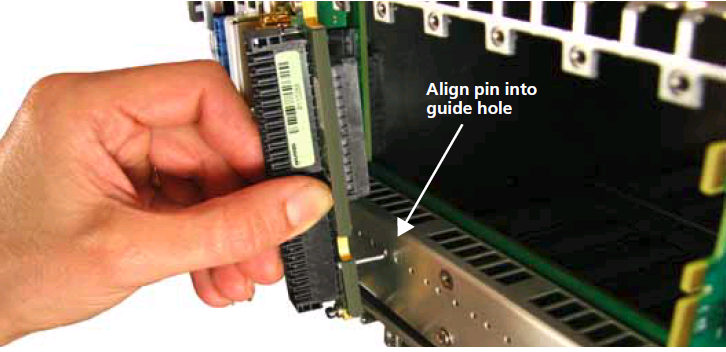
Example of Back Module Installation
- Apply labels to the back module, if these are supplied separately.
- Print out this page and write down the placement of the back modules in the diagram below (back modules appear on the reverse side when viewed from the front).

Writing Space for Identifying Back Modules

CAUTION
Do not mix and match back and front modules. The front module must mate with a back module of the same product.
- (SEL-UCIP modules only) Check to ensure that the board-mounted fan module is flush with the heat sink. If the fan is protruding, it may scrape and damage the adjacent MCP module in the frame.
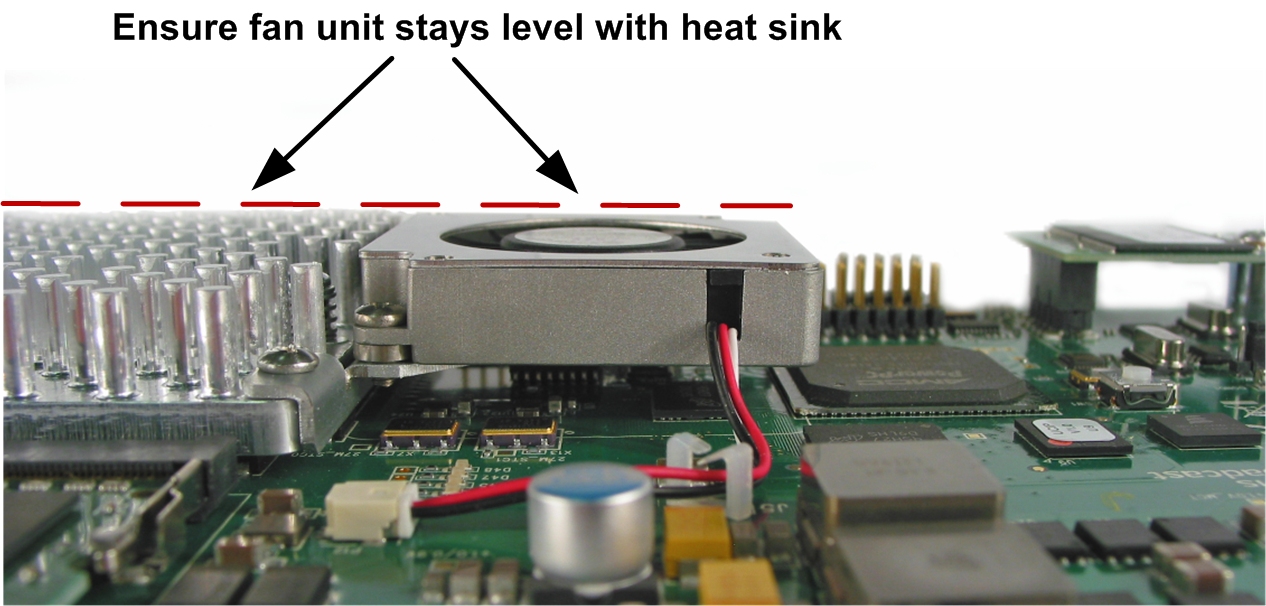
Position of Module Fan (SEL-UCIP)
- Open the front panel and then slide the correct front modules into the slots that match the back modules.
- Push the module until it seats properly, ensuring the edge of the module is flush with the edge of the module guides, and the square extractor handle clicks into its slot.
- Install the remaining back and front modules, make all of the necessary rear connections, and then close the front panel.
CAUTION
To prevent overheating during frame operation, keep the front panel closed and all back module slots covered. Do not open the cover for more than a couple of minutes when the frame is running.
- Close the front panel to ensure proper frame ventilation.
|
© 2018 Imagine Communications Corp. Proprietary and Confidential |
Return to Top |